
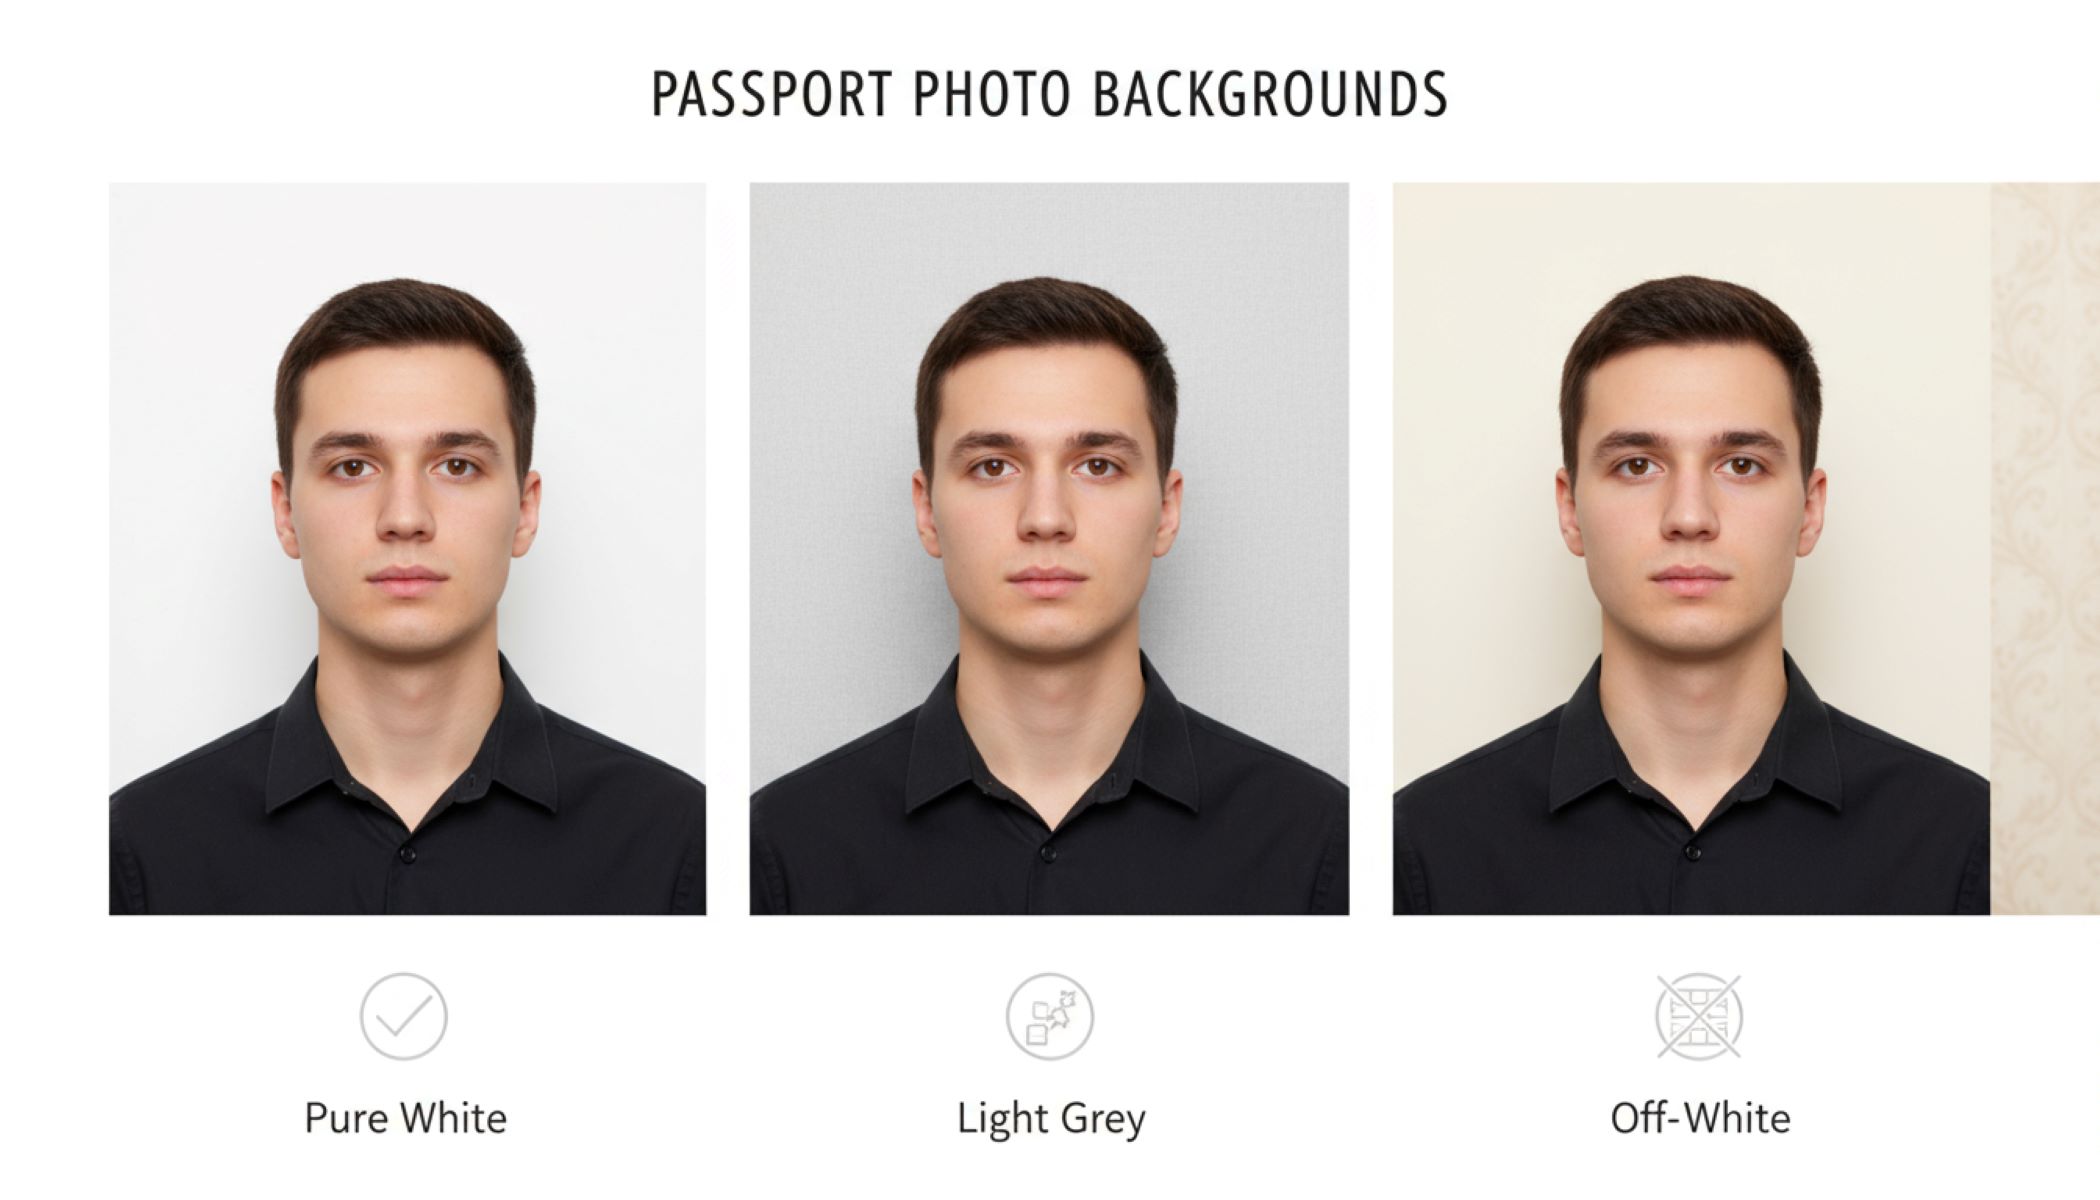
Getting your passport photo right can feel like a small but crucial task. One tiny mistake, such as the wrong background, can lead to your application being rejected. And let’s be honest—no one wants the hassle of retaking photos, wasting time, or standing in line again. That’s why understanding how to choose the right background for a passport photo is so important. In this guide, we’ll break it all down step by step: what’s required, what to avoid, and how to set up the perfect backdrop whether you’re at home or at a studio. Let’s dive in.
Why the Background Matters in a Passport Photo
When it comes to passport photos, the background plays a far bigger role than most people realize. It isn’t simply a matter of aesthetics or “looking nice”—it’s a legal and technical requirement. Passport authorities use sophisticated facial recognition software to verify your identity, and a cluttered or patterned background can interfere with the system’s ability to clearly detect the contours and features of your face. Even small shadows, textures, or objects in the background can cause the photo to be rejected, delaying your application and forcing you to retake it. A clean, neutral backdrop ensures that your face stands out sharply and can be easily scanned, which is why it’s considered a non-negotiable element of the photo.
Beyond compliance with technical standards, the background also plays a psychological role in how your photo is perceived. A plain, light-colored background creates a sense of clarity and focus, allowing the viewer—whether it’s a human officer or automated system—to concentrate on your facial features without distraction. In contrast, a background with patterns, furniture, or other visual noise can pull attention away from your face, making the photo look unprofessional and potentially invalid for official purposes. Think of it as a theater stage: if the backdrop is messy, the performance—the main subject, you—loses its spotlight.
Lighting and color are other critical reasons why the background matters. A neutral, evenly lit background prevents unwanted shadows, glare, or color casts that could distort your skin tone or facial features. Harsh shadows behind your head or uneven lighting can make your photo fail the official requirements, even if your face is perfectly centered and well-framed. The background essentially sets the “canvas” for your portrait, and getting it right ensures that your photo meets both aesthetic and regulatory standards simultaneously.
Finally, the background ensures consistency and uniformity across all passport photos, which is essential for identity verification on a global scale. Officials expect certain standards so that photos can be compared quickly and efficiently, whether it’s for domestic travel, visas, or border control. Using the correct background eliminates the risk of subjective interpretation, reduces errors in automated systems, and helps maintain a streamlined process for everyone. In short, a properly chosen background isn’t just a suggestion—it’s a fundamental part of producing a valid, professional, and legally acceptable passport photo.
The Universal Requirements for Passport Photo Backgrounds
| Requirement | Description | Why It Matters | Common Mistakes to Avoid | Tips for Compliance |
| Plain Background | The backdrop must be free of patterns, textures, objects, or any visual noise. | Ensures the focus remains solely on your face for identification purposes. | Using wallpaper, furniture, or cluttered rooms as a background. | Use a plain wall, solid sheet, or professional backdrop. |
| Light-Colored | Typically white, off-white, cream, or light gray. | Creates a clear contrast with your facial features and clothing. | Dark or overly bright backgrounds that either blend or glare. | Choose neutral, soft shades that work with your skin tone. |
| Even Lighting | The background and your face must be evenly lit without shadows or hotspots. | Prevents distortions and ensures facial recognition software works accurately. | Standing too close to the wall or using uneven lighting sources. | Use natural light from a window or soft artificial lights on both sides. |
| High Contrast | Your face and clothing should stand out clearly against the background. | Helps passport authorities and facial recognition systems distinguish features. | Wearing clothes that match the background color or low contrast setups. | Opt for darker, solid-colored clothing if using a white background. |
| Neutral Texture | Avoid shiny, reflective, or textured surfaces like mirrors or metal walls. | Prevents reflections, glare, and visual distractions in the photo. | Shiny surfaces, curtains, or glossy posters behind you. | Use matte surfaces or professional photo backdrops for best results. |
Standard Passport Background Colors by Country
When it comes to passport photos, background color requirements differ slightly from country to country, and ignoring these rules can result in rejected applications. While many countries prefer light, neutral colors, each one has its own accepted shades. Here’s a detailed look at the typical background color requirements around the world.
- United States: The standard for U.S. passport photos is a plain white or off-white background. This ensures that the face stands out clearly and that facial recognition systems can accurately scan the photo. Any patterns, textures, or objects behind the subject are strictly prohibited, so even subtle shadows can be problematic.
- United Kingdom: In the UK, passport photos usually require a plain cream or light grey background. The lighter tones help create contrast with clothing and skin tone, ensuring that the face remains the primary focus. It’s important to avoid colored walls, furniture, or decorations in the frame.
- Canada: Canadian passport photos require a white or light-colored background. This guideline is similar to the U.S., with the key goal being to produce a clean, distraction-free backdrop. Natural light or even lighting is recommended to avoid shadows, which can lead to photo rejection.
- India: Passport photos in India must be taken against a white or plain light-colored background. Authorities emphasize a bright, neutral backdrop to clearly highlight facial features, and photos with patterns, textures, or colored walls are not accepted. Proper lighting and contrast are also essential.
- Australia: Australian passport photos call for a white or light grey background. Like other countries, the focus must be on the face, and any shadows, patterns, or objects in the background can result in rejection. Maintaining a consistent, even tone is crucial.
- China: China accepts light blue or white backgrounds for passport photos. Light blue is often preferred for a softer look, while white provides maximum clarity. Avoid dark or patterned backgrounds, and ensure there is no glare or shadows affecting the face.
- European Union Countries: Most EU countries, including Germany, France, and Italy, require a white, light grey, or cream background. The background should be uniform and neutral to ensure maximum contrast with the subject’s face. Any irregularities, textures, or colored surfaces are not allowed.
White vs. Light Grey vs. Light Blue: Which Works Best?
When it comes to choosing the perfect background for a passport photo, the color choice can significantly affect the clarity and compliance of your photo. White is the most widely accepted and universally safe option. Its bright, neutral tone provides a clean, sharp contrast with almost all skin tones and hair colors, making your face the focal point. White backgrounds are particularly useful in countries with strict international standards, such as the United States and India, because they minimize distractions and help automated systems accurately detect facial features. Moreover, white backgrounds are less prone to casting color reflections onto your face, ensuring that your skin tone appears natural and uniform.
Light grey backgrounds serve a slightly different purpose and can be especially helpful when your clothing or hair color might blend into a stark white backdrop. For instance, if you wear a white shirt or have very light hair, a plain white background could reduce the contrast between you and the background, making facial recognition more challenging. Light grey provides enough neutrality to comply with most passport standards while creating subtle contrast, ensuring that both your facial features and attire stand out clearly. Additionally, grey can help reduce glare in photos taken under harsh lighting conditions, producing a more balanced and professional-looking image.
Light blue is less common but accepted in certain countries, like China, where it can create a softer, visually appealing backdrop. This color reduces harsh contrasts, giving the photo a gentle and calm aesthetic while still meeting technical requirements. Light blue backgrounds are particularly advantageous in situations where natural light or indoor lighting causes shadows or uneven brightness, as the soft hue helps balance these variations. However, it’s crucial to check the specific passport or visa regulations of the country, as not all authorities accept blue, and using it incorrectly could result in rejection.
Ultimately, the choice between white, light grey, and light blue depends on both regulatory requirements and practical considerations. White is almost always the safest bet, offering universal acceptance and maximum contrast. Grey is a smart alternative when you need to account for clothing or hair colors that might blend into a white background, while light blue provides a softer, less clinical option for certain accepted countries. Understanding these nuances ensures that your passport photo not only looks professional but also meets all official standards, avoiding unnecessary delays or complications in your application process.
Common Mistakes People Make with Backgrounds
| Mistake | Description | Why It Causes Problems | How to Avoid It | Additional Tips |
| Patterned Wall | Using wallpaper or walls with textures, patterns, or designs. | Distracts from the face and can confuse facial recognition systems. | Use a plain, solid-colored wall or backdrop. | Matte surfaces work best to prevent glare and reflections. |
| Curtains or Furniture | Taking the photo in front of drapes, chairs, or other household items. | Objects behind the subject create visual noise and reduce clarity. | Remove furniture from the frame or hang a plain sheet. | Ensure the sheet or wall is smooth and wrinkle-free. |
| Shadows from Poor Lighting | Uneven lighting that casts shadows on the background or face. | Shadows distort facial features and make the photo non-compliant. | Use soft, even lighting from multiple sources. | Position the subject away from the wall to minimize shadows. |
| Background Too Dark or Bright | Using a background that is either too light or too dark. | Reduces contrast and may obscure facial features. | Stick to light, neutral colors like white, cream, or light grey. | Test the photo with the camera before finalizing it. |
| Digital Editing / Photoshop | Attempting to artificially change the background. | Most authorities detect edits, and the photo may be rejected. | Take the photo against a compliant background instead. | Only use digital tools approved by official guidelines. |
Studio vs. DIY Passport Photos
Deciding whether to go to a professional studio or take your passport photo at home can make a big difference in both quality and convenience. Both options have advantages and drawbacks, and understanding them can help you choose the best method for your situation.
- Studio Passport Photos: One of the main benefits of going to a photo studio is that the professionals there know exactly what passport authorities require. They have the right lighting, backgrounds, and camera equipment to ensure your photo meets all official standards. Studios also provide instant feedback, so you can make adjustments until the photo looks perfect. This guarantees a higher likelihood that your application will be accepted on the first try. However, studio photos usually cost more than doing it yourself, and you might have less control over aspects like how you look, your pose, or subtle expressions.
- DIY Passport Photos at Home: Taking your photo at home is convenient and cost-effective. You can retake the photo multiple times without worrying about paying extra, which is especially helpful if you want to ensure the lighting, pose, and background are just right. It also allows for flexibility in timing—you don’t have to schedule an appointment or travel to a studio. On the downside, there is a higher risk of making mistakes, especially with the background. Poor lighting, shadows, or an inappropriate backdrop can result in a photo that doesn’t meet official requirements, which could force you to retake it anyway.
- Background Setup for DIY Photos: If you decide to take your photo at home, setting up the background correctly becomes even more critical. A plain, neutral-colored wall or a solid sheet hung behind you works best. Avoid clutter, patterned walls, furniture, and any objects that might appear in the frame. Ensuring the background is smooth, wrinkle-free, and evenly lit can dramatically improve your chances of producing a compliant photo.
- Making the Right Choice: Ultimately, the decision between a studio and DIY setup comes down to convenience, budget, and confidence. If you want a quick, guaranteed result and don’t mind spending a little extra, a studio is the safest bet. If you prefer flexibility and cost savings and are willing to invest time in setting up proper lighting and a compliant background, a DIY photo can work just as well. Understanding the pros and cons of each option ensures you choose the method that meets your needs without compromising on quality or compliance.