
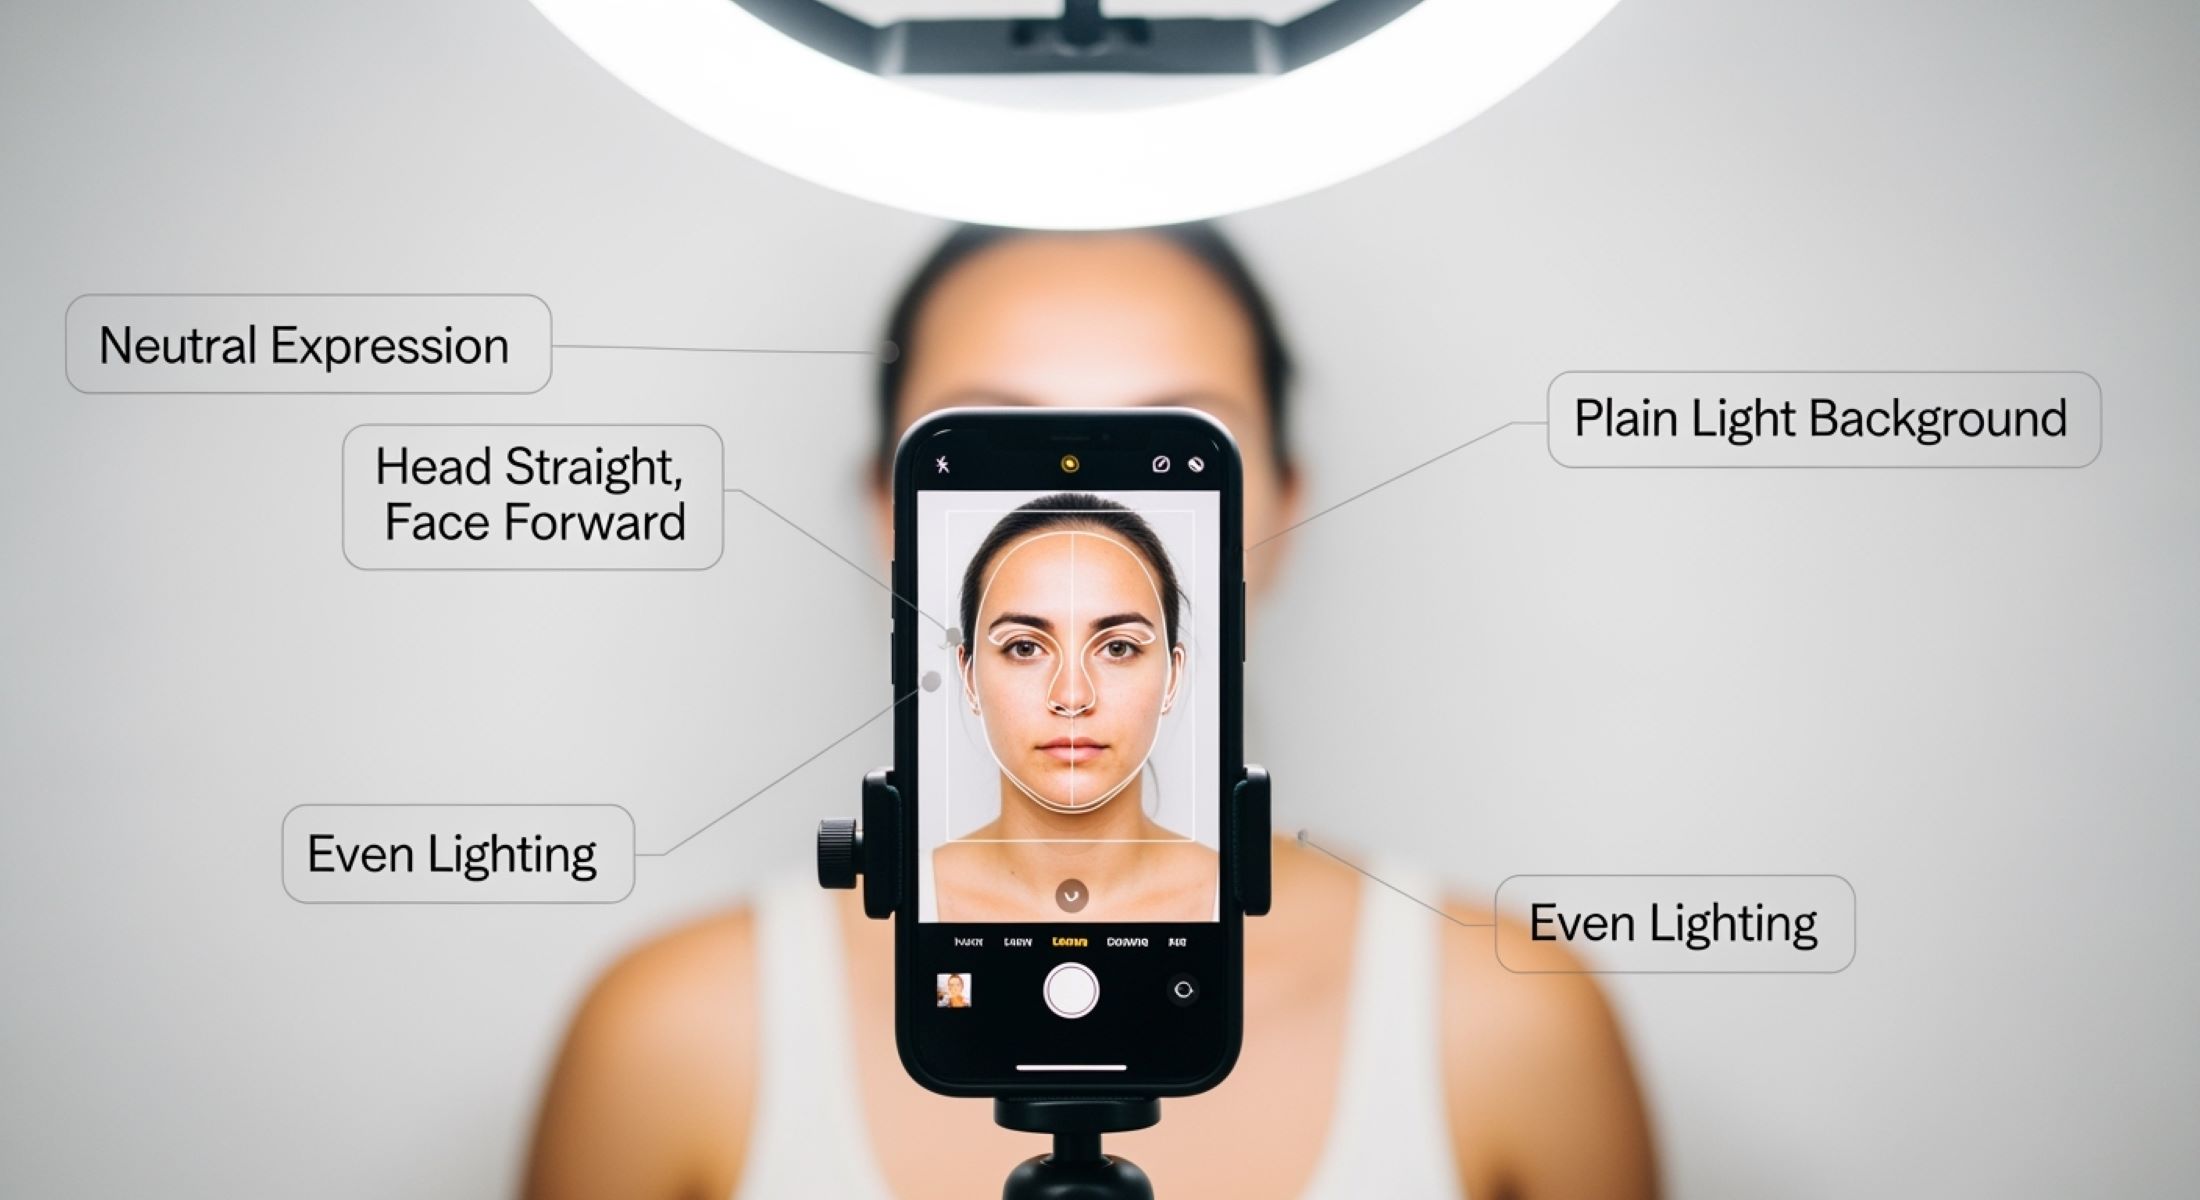
A biometric photo isn’t just any snapshot—it’s your identity captured in a single frame. Governments, immigration offices, and even job applications rely on these photos to verify who you are. Unlike casual selfies, biometric photos come with strict rules. From head position to lighting, every detail counts. Mess it up, and you’ll face delays, rejections, or worse, a wasted trip to the application center.
The Basics of a Biometric Photo
A biometric photo might seem like just another passport or ID picture, but it’s much more precise than a casual snapshot. Unlike selfies or social media photos, these images are designed for identity verification systems. This means that every detail of your face must be clearly visible, properly aligned, and free from distractions. The main idea is to create a consistent and universally recognizable image of you, so that facial recognition systems, border control officers, or any official personnel can easily verify your identity without ambiguity.
One of the most important aspects of a biometric photo is the expression on your face. A neutral expression is mandatory—this means no smiling, frowning, or exaggerated facial gestures. While it might feel strange at first to keep your face expressionless, this rule ensures that your facial features are captured accurately and consistently. Even subtle changes in expression can affect automated systems that rely on biometric analysis, making a neutral, calm look critical.
Another crucial requirement is the head and posture positioning. You must face the camera directly, keeping your head straight and level. Tilting your head up, down, or to the sides can distort your facial proportions and may result in photo rejection. The shoulders should also remain visible and squared to the camera, giving a balanced view of your upper body. This positioning helps maintain standardization across all biometric images, which is particularly important when authorities compare photos over time or across different identification documents.
Finally, the background and overall presentation matter just as much as your face. A plain, light-colored background such as white, cream, or light gray is typically required, as it provides a clear contrast with your facial features. Any shadows, patterns, or busy elements in the background can interfere with facial recognition software. Additionally, filters, heavy editing, or enhancements are strictly prohibited because the goal is to capture your natural, unaltered appearance. Correct size and ratio—usually 35mm by 45mm—must also be adhered to, although specific requirements may vary depending on the country or document type.
Setting Up Your Space
| Element | Description | Tips for DIY Setup | Common Mistakes to Avoid | Pro Advice |
| Background | A plain, uncluttered backdrop ensures your face is clearly visible. | Use a white or light-colored wall, or hang a smooth sheet without wrinkles. | Using patterned walls or busy décor. | Iron the sheet if needed; tape it tight for smoothness. |
| Lighting | Proper lighting prevents shadows and highlights your facial features evenly. | Face a window for natural light; add a soft lamp to balance lighting. | Overhead or harsh side lights that cast shadows. | Use multiple light sources or a ring light for even illumination. |
| Space | Distance from camera impacts framing and clarity. | Stand or sit about 1 meter from the camera for proper head and shoulder framing. | Being too close or too far, which distorts proportions. | Use a tape marker on the floor to maintain consistent distance. |
| Camera Angle | Ensures your face is captured straight-on without distortion. | Keep the camera at eye level, directly in front of you. | Tilting the camera up, down, or sideways. | Use a tripod or stable surface to maintain perfect alignment. |
| Stability | Prevents blur and ensures a sharp image. | Use a tripod, shelf, or stack of books to hold your camera steady. | Holding the camera in your hand or moving during the shot. | Use a timer or remote shutter to avoid shaking. |
The Right Equipment
- Smartphone or Digital Camera – You don’t need a professional DSLR to capture a proper biometric photo. Most modern smartphones with at least 5MP resolution are more than sufficient. Make sure the camera lens is clean and free from smudges to avoid blurry images.
- Tripod or Stable Surface – Stability is key. Shaky hands or uneven surfaces can result in blurry photos that get rejected. A tripod is ideal, but you can also use a stack of books, a shelf, or any flat surface to keep your camera steady.
- Timer or Remote Shutter – Using a timer or remote shutter allows you to position yourself properly and hold a neutral expression without rushing. Most phones have built-in timers, and some cameras support remote controls or apps.
- Ring Light – Optional but highly recommended for balanced, even lighting. A ring light reduces shadows and ensures your face is illuminated from all angles. This is especially useful if you are taking the photo indoors or in low-light conditions.
- Photo Editing Software – Only for cropping and resizing. You can adjust brightness or contrast slightly if necessary, but avoid any retouching that alters your appearance. The goal is a natural, accurate image.
- Plain Background Material – If you don’t have a blank wall, you can use a white or light-colored sheet. Make sure it’s smooth and free of wrinkles to avoid unwanted shadows.
- Mirror or Self-Check Tool – Helps you check your posture, head position, and expression before taking the shot. Small adjustments in alignment can make a big difference in compliance with biometric standards.
- Extra Light Sources – Optional lamps or daylight substitutes to eliminate shadows and enhance overall clarity. Position lights on either side of your face for even coverage.
- Measuring Tape or Ruler – Helps maintain the proper distance from the camera (usually about 1 meter) and ensures your head and shoulders are correctly framed.
- High-Quality Photo Paper (for prints) – If you need a printed photo, invest in glossy or matte photo paper to ensure sharpness and clarity.
Perfecting the Lighting
Lighting is often the most critical factor in taking a high-quality biometric photo, yet it’s one of the easiest things to get wrong when shooting at home. Proper lighting ensures that your facial features are clearly visible, evenly illuminated, and free of distracting shadows or glare. Without it, even the most carefully posed photo can be rejected. Think of light as the spotlight on a stage—it highlights the main subject (you) and eliminates anything that could interfere with clarity.
The first step to perfect lighting is to face the light source directly. Natural daylight is ideal, so positioning yourself in front of a window usually works best. If sunlight is too harsh, diffuse it with a thin curtain or white sheet. Avoid relying solely on side lighting, which can cast uneven shadows across your face, making your features appear asymmetrical. Balanced, frontal light is the key to capturing a neutral and standardized image.
Another common pitfall is using overhead lights, such as ceiling lamps, which tend to create dark areas under your eyes, nose, and chin. These shadows can alter the perceived shape of your face and may cause automatic systems or officials to flag your photo as invalid. If overhead lighting is unavoidable, supplement it with additional sources placed in front of your face to neutralize the shadows. Even a simple desk lamp angled correctly can make a noticeable difference.
Finally, always check for unwanted shadows before taking the final shot. Look closely at areas like the sides of your nose, under your jawline, and around your hairline. Shadows can appear even when you think the lighting is sufficient, especially if the background or nearby objects reflect light unevenly. Adjust the position of your lights, add another soft light source, or slightly reposition yourself until all shadows are minimized. A well-lit, evenly illuminated face increases the chances of your photo being accepted on the first try.
Choosing the Right Outfit
| Aspect | Description | Recommended Options | Common Mistakes | Pro Tips |
| Color | The color of your clothing affects how well you stand out against the background. | Dark colors like navy, black, or deep green; muted tones work best. | Wearing white or very light shades that blend with the background. | Test your outfit against a plain wall before taking the photo to ensure contrast. |
| Patterns | Busy patterns can distract from your face and violate biometric rules. | Solid colors or minimal textures. | Stripes, checks, floral prints, or logos. | Stick to plain fabrics to keep the focus on your face. |
| Neckline & Collar | Frames your face and shoulders appropriately in the photo. | Collared shirts, crew necks, or simple blouses. | High necks that hide the neck or open collars that look messy. | Choose something that covers shoulders but doesn’t distort proportions. |
| Accessories | Small items can interfere with facial recognition and photo clarity. | Minimal jewelry; small, subtle pieces if necessary. | Large necklaces, scarves, or statement pieces. | Remove flashy jewelry that could reflect light or create shadows. |
| Uniforms & Attire | Certain uniforms are only allowed if required for official reasons. | Wear only professional or neutral clothing. | School uniforms, sports jerseys, or ceremonial attire (unless explicitly required). | Always check official requirements; if unsure, choose neutral everyday attire. |
Hair and Makeup Rules
- Hair Positioning – Hair should neatly frame your face without covering your eyes or forehead. Long hair should be tucked behind your ears to ensure that your facial features are fully visible. Avoid hairstyles that create shadows on your face or obscure your jawline.
- Hairstyle Simplicity – Keep hairstyles simple and natural. Extravagant hairdos, high-volume curls, or unusual styles may interfere with official biometric standards. The goal is to present a neutral, consistent image.
- Makeup – Makeup should enhance your natural look but never exaggerate your features. Avoid glitter, heavy contouring, dark eye makeup, or false eyelashes that alter your appearance. Light, natural makeup is acceptable if it does not distort facial features.
- Glasses – Most biometric photo guidelines prohibit glasses, especially tinted or reflective lenses. If glasses are allowed, make sure there is no glare, reflection, or shadow on your eyes. Remove sunglasses, colored lenses, or decorative frames.
- Head Coverings – Religious or cultural head coverings are usually permitted, but they must not cover any part of the face. Your forehead, eyes, nose, and chin must remain fully visible. Avoid hats or fashion accessories that are not for religious purposes.
- Facial Visibility – Ensure that nothing, including hair, hands, or clothing, obstructs your facial features. Both ears should be visible if possible, and your face should be evenly illuminated.
- Consistency – The same hair and makeup style should be maintained for all official documents to ensure consistency in facial recognition or ID verification processes.
- Check for Shadows – Be aware of how your hair or head covering may cast shadows across your face. Adjust lighting or hair placement to avoid dark spots that obscure features.
- Natural Look – Overall, the aim is to present a neutral, natural appearance. Your photo should reflect how you typically look on a daily basis, without any exaggerations or distractions.
- Regular Review – Before taking the final photo, check yourself in a mirror to ensure that all facial features are visible, hair is in place, and makeup is natural. This self-check can prevent photo rejection.
Getting the Pose Right
Getting the pose right is one of the most overlooked aspects of a biometric photo, yet it’s crucial for compliance. Unlike casual selfies or social media pictures where you can tilt your head or strike playful expressions, a biometric photo demands precision. The purpose is to capture your face in a standardized, reproducible way, so anyone reviewing your image—whether a human officer or automated facial recognition system—can easily identify you. Even minor deviations in posture or angle can result in rejection.
The first step is to sit or stand straight. Good posture ensures your shoulders are squared, your head is not leaning forward or backward, and your body appears balanced in the frame. Slouching or leaning can distort your proportions and make your face appear off-center, which violates biometric guidelines. Think of it as holding a professional ID card pose—simple, upright, and neutral.
Next, keep your head centered and level. Your face should occupy the middle of the frame, with your eyes at the proper height relative to the camera. Avoid tilting or turning your head, as even a slight angle can create asymmetry in the photo. This central alignment ensures that all facial features are clearly visible and measurable, which is critical for biometric systems.
Finally, maintain a neutral expression and look directly into the camera lens. Keep your mouth closed, eyes fully open, and refrain from smiling, frowning, or raising your eyebrows. This neutral expression provides a consistent and objective representation of your face. Imagine you’re looking into a friend’s eyes rather than posing for a casual snapshot—your gaze should feel natural, calm, and focused, which helps the photo pass official requirements without issues.